How to create a scheduling calendar

How to create your own website or form to accept online appointment scheduling

You’re a hairstylist, a dentist, an accountant, you have a hall for events or you offer hourly or daily services, you are in the right place. With AbcSubmit you can create your own online calendar and accept even payments for your online appointments scheduling.

Scheduling appointments are one of those tasks you should be passing on to your computer—and luckily, AbcSubmit is here to help you schedule appointments online as pain-free as possible. AbcSubmit will ensure your timetable is never overbooked—and that appointments can get re-scheduled without you having to double-check your calendar every time.

  1. Go to our website editor and create your desired website using an existing website template or create your website from scratch.

Or create a form using existing form templates or create your form from scratch and publish on your AbcSubmit website, Weebly, Wix etc.                                                       

2. If you already have an AbcSubmit account, you can log in, and then to either choose an existing website or create a new one to add a calendar. If you don’t yet have an AbcSubmit account, you can sign up and then create your own online appointments scheduling website. 

3. After creating your website or form, drag and drop from the left sidebar the Calendar field from the Form section in your page.

Create your own appointments scheduling calendar

4. Click on the Calendar field in the editor and set your calendar to be public or just read only by changing the option Read only calendar in the left sidebar under Calendar option.

5. Click on the Calendar field in the editor and set your calendar default view mode(day, month, week) by changing the option Default view mode in the left sidebar under Calendar option.

Set default calendar mode

6. Click on the Calendar field in the editor and enable or disable the changing of view mode for your clients by changing the option View mode control in the left sidebar under Calendar option.

7. Click on the Calendar field in the editor then under the Calendar property in the left sidebar, click on -> Calendars to select an existing calendar or create a new one.

Assign a calendar or create a new one

8. If you want to create a new calendar click on Manage your calendars under Select calendar(s) screen and then in the new screen, click on Create new in the left-top corner.

Click on +Create new to add a new calendar to your account.

Create new calendar for your website

9. On My Calendars screen, you can manage your calendar settings by clicking Settings.

10. On My Calendars screen, you can manage your calendar settings by clicking Settings.

Change calendar setting for your appointments scheduling website

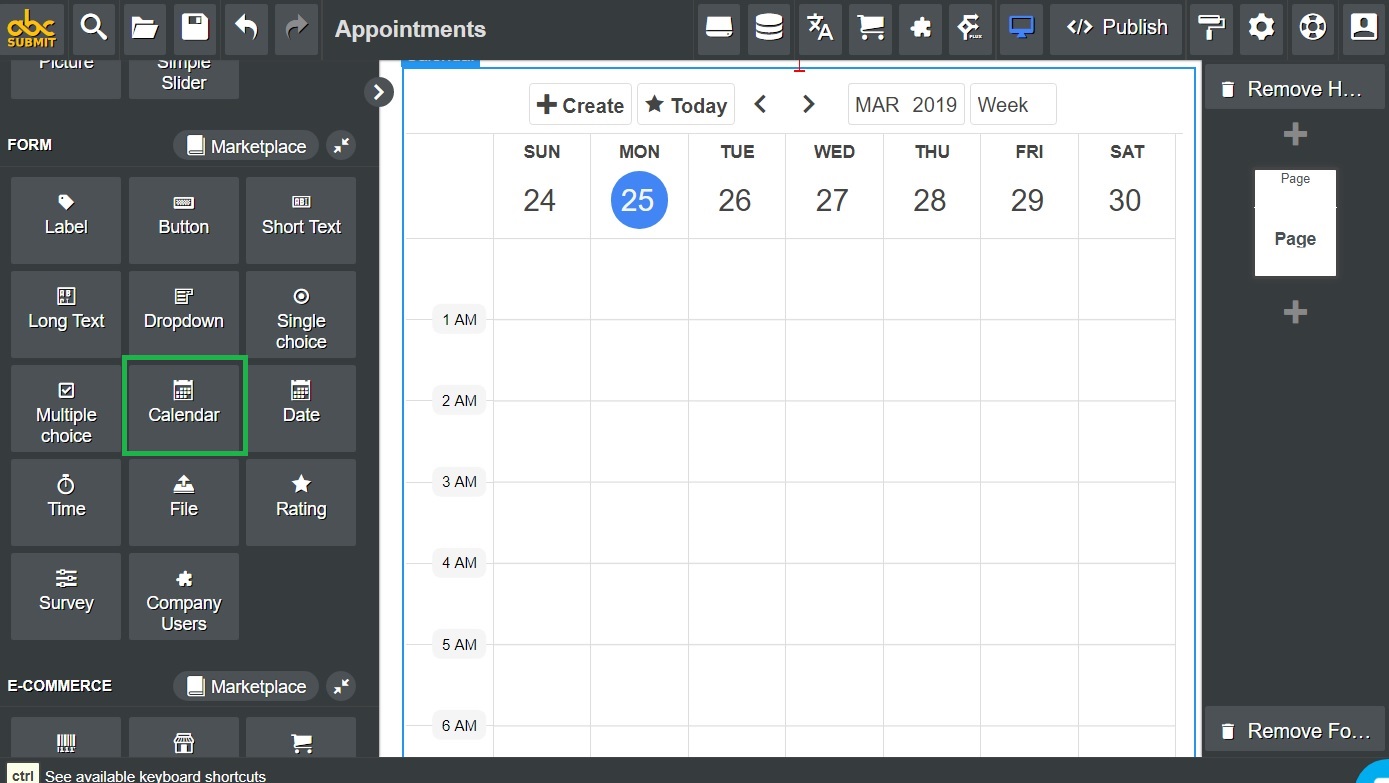
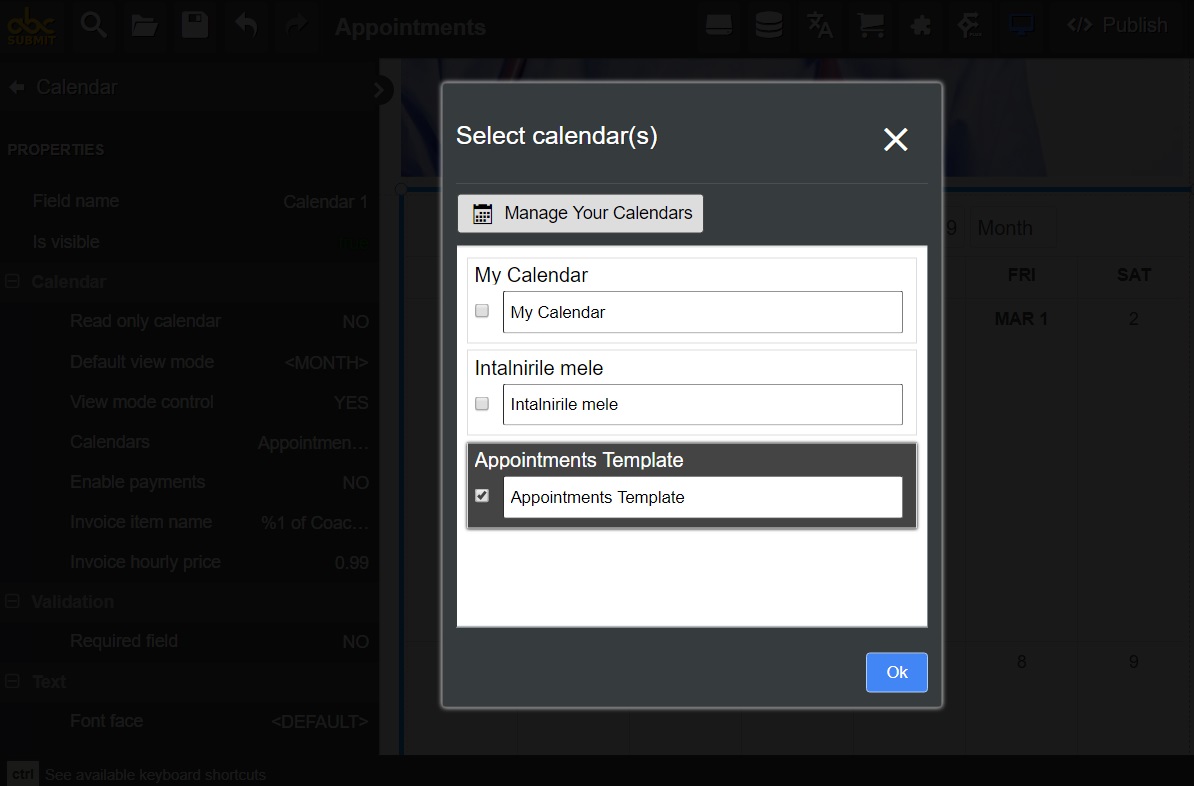
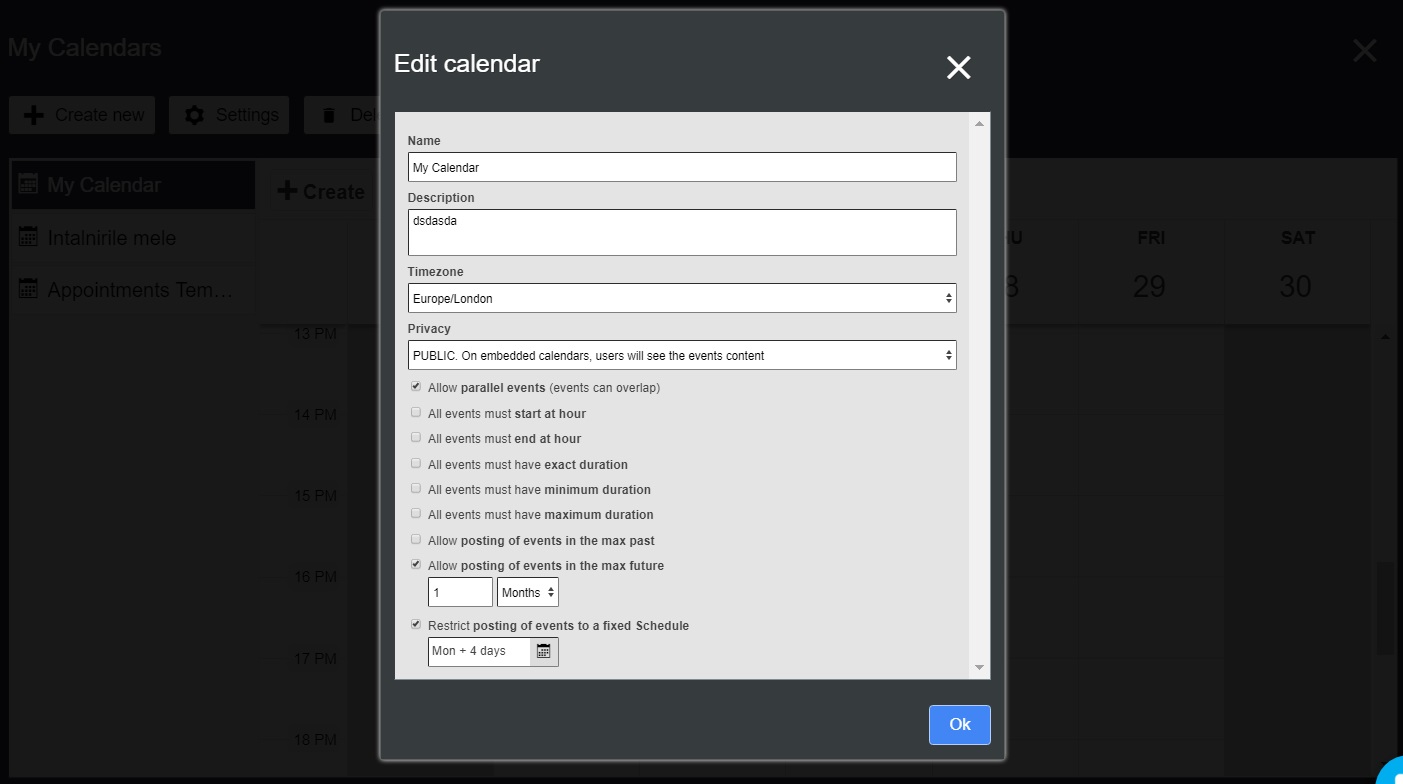
My calendar settings meaning.

a. Name – the name of your calendar.

b. Description – description for your calendar.

c. Timezone – enables you to choose your timezone.

d. Privacy – if you choose, your clients will see the content of your events.

  1. PUBLIC –  your clients will see the content of your events
  2. PRIVATE – your clients will see existing events as busy.

e. Allow parallel evens – if enabled, you can receive multiple events at the same time interval.

f. All events must start at hour – you will force your users to select starting with the hour specified by you.

g. All events must end at hour – you will force your users to select before the hour specified by you.

h. All events must have exact duration – you will force users to select the time interval you set(30 minutes, 1 hour etc)

i. All events must have minimum duration – you can set the minimum duration of your events/booking.

j. All events must have maximum duration – you can set the maximum duration of your events/booking.

k. Allow posting of events in the max past – specify how far in the past you want to allow your clients to post events(ex: 1 minute).

l. Allow posting of events in the max future – specify how far in the future you want to allow your clients to post events(ex: 20 years).

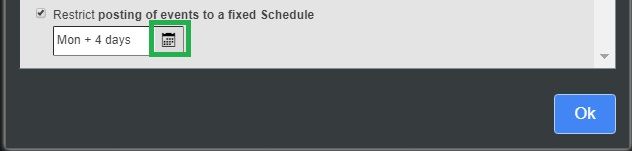
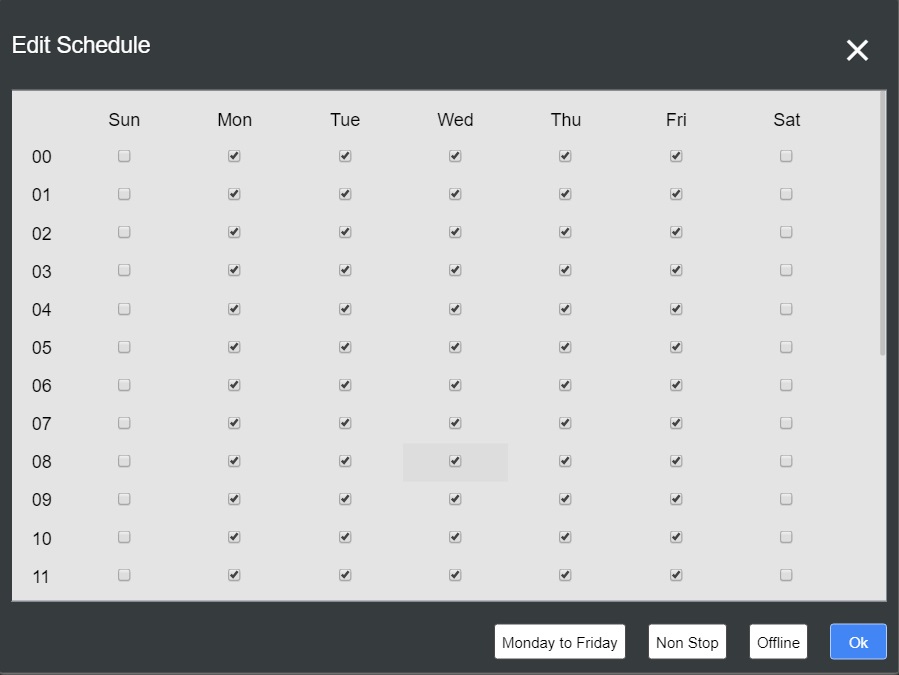
m. Restrict posting of events to a fixed schedule – enables you to choose your working hours and days to accept online appointments scheduling.

Click on the calendar icon to edit your schedule.

Choose your working hour and weekdays.

Edit and save schedule for your appointments scheduling

11. Enable payments and set hourly prices for your online appointment scheduling calendar. You can accept payments through Paypal, Stripe Checkout, Braintree Checkout, and Square.

You are ready to go live with your calendar. Happy online appointments scheduling! 

Spread the love